Trying to plan and navigate your way through Yosemite National Park can be a bit challenging. There are a multitude of hikes, sights, and places to stay that can leave one overwhelmed with options. As I write this during a time when COVID-19 is still part of our lives, there may be a little more preparation involved in your trip. While my visit was made at the beginning of May 2021, some things will be changing in the not too distant future. As of May 21, 2021, reservations are required to enter the park. The timed entry tickets for a number of dates have started to be released. You can explore your options for visiting at https://www.recreation.gov/timed-entry/10086745.

Once your tickets are secure, there are a few things to consider for your visit. There are several options for places to stay. My choice was the Chateau du Sureau in Oakhurt, California. See my post on The Appealing Chateau du Sureau for the full rundown on this Relais & Chateaux property. This left me a little over one hour from some of the main attractions in the park. If this seems excessive and you want to be closer, there are a number of options on highway 41 before the south entrance to the park in addition to tents and lodging within the park itself. The drive north on highway 41 from the Chateau du Sureau does require your explicit attention on the two lane road with a number of blind curves. This is magnified once you enter the park and make your way on turn after turn into the Yosemite Valley.
The next thing you may want to think about is how you would like to spend your time in the park and what entrance these attractions are located near. To simplify things slightly, consider 41, 140, and 120 as routes in and out of the park. Highway 41 is the route I utilized daily for park entry. It is the south entrance that takes you past Mariposa Grove and the road to Glacier Point. As you continue north, this route will take you into Yosemite Valley and the “loop” with a number of attractions and hiking trails along the way. You will know you are getting close to the action when you pass a sign that says tunnel view one mile. Once you go through the tunnel, you will be greeted with spectacular, iconic views of the valley on the other side particularly the Bridalveil Falls waterfall. Be ready to turn into one of the two parking lots which are located on the right and left sides of the road after exiting the tunnel. You may notice as you are driving through the tunnel people walking on the narrow sidewalk to one of the two enclaves that give off light from the other side of the valley. On our second day in the park, we walked to the first tunnel viewpoint. The walk down this view was dark, muddy, and wet. At the end, I realized that the gate was locked and really prevented viewing any significant vantage point of the surroundings. This kept me from walking down the second tunnel view. It did not seem worthy of the venture. If the gate was not locked, you could probably take some spectacular photos. However, I did not find this to be the case from inside the tunnel. Rather, the parking lot overlooking the valley was one of my favorite views.
After stopping for the view, continue your drive into the valley and consider making your next stop alongside the road where you will find a view of Bridalveil falls, Yosemite falls, and El Capitan. When I was visiting, Bridalveil Falls was currently under the restoration process. Even though you cannot get close, you can admire from afar. Something to keep in mind is the waterfalls are generally plentiful in the spring time. At other times throughout the year, the flow can slow a significant amount. Bridalveil is one of the few that does flow throughout the entire year even though its powerful mist becomes weaker.
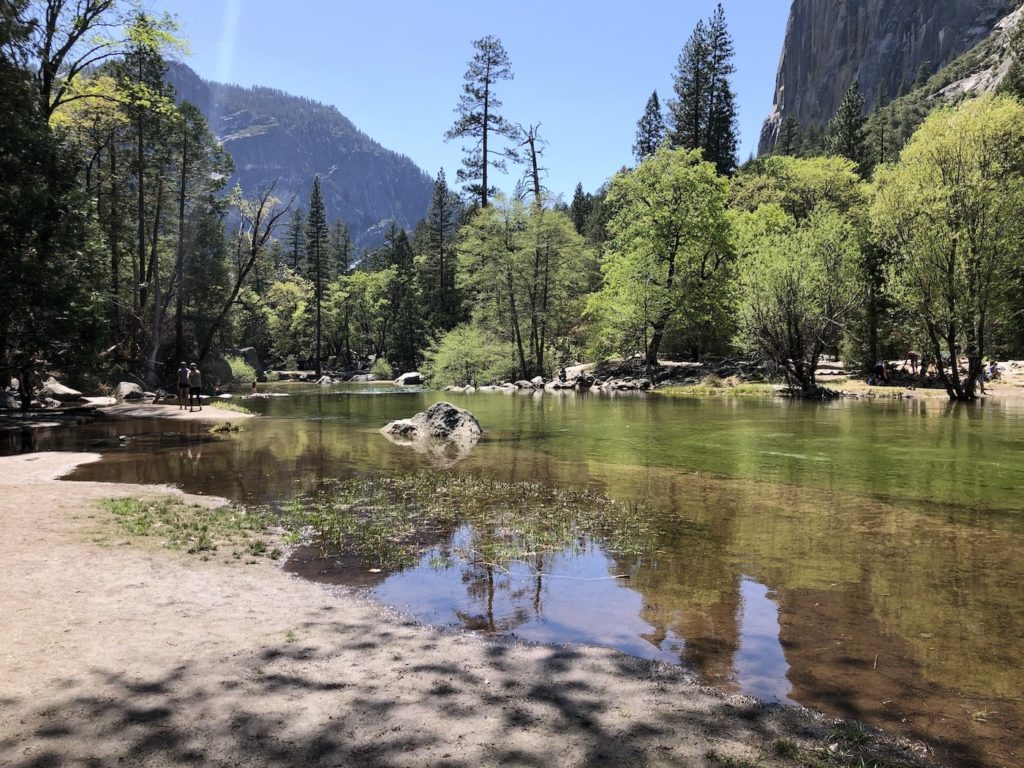
If you keep driving, you will arrive in Curry Village. This is a great area to park and have access to a lot of different trails. Alternatively, if you see signs for the Happy Isles Nature Center, you will also be in the right vicinity to start walking around and exploring. There is food in this area if you are hungry prior to setting out on a hike. I used this stop to gain access to the trail to Mirror Lake. What I have always had difficulty with in the past is seeing the roundtrip distance for a trail and thinking it sounds reasonable, only to find out that you have to walk an additional distance to get to the actual trailhead. The trail to Mirror Lake is is described as 2 miles roundtrip with the difficulty level as easy. I would describe the trail as easy, but factor in additional distance to account for your parking spot and the actual start of the trail. Mirror Lake was nice, but it wasn’t impressive to me. At the risk of being offensive, I will say the scenery isn’t necessarily something extraordinary to admire. If I were going to do things again, I would have tried the Mist Trail. The hike is longer, and the difficulty level is increased due to over 1,000 foot elevation gain. If you have more time and don’t mind something a little more challenging, I would recommend a different hike. However, if your interests are in an easy trail with some relaxation at the end, try Mirror Lake. Many people were relaxing, picnicking, and swimming at the lake.
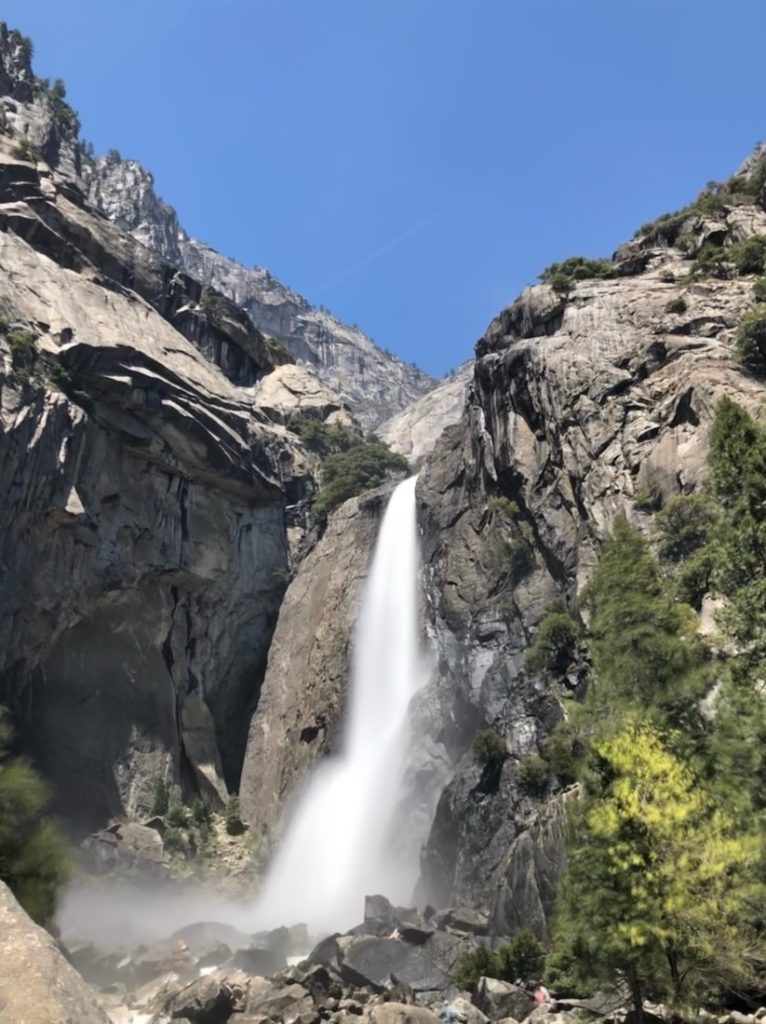
If you were to continue past Happy Isles Nature Center and around the loop, you will come to the Yosemite Valley Lodge. Across from the lodge, you will find the start to the upper and lower Yosemite trails. I went on the lower trail, which is very easy with nearly no elevation gain. It is a relatively short walk to views of the waterfall. The waterfall was pretty plentiful in May, and there is a slight mist coming off the falls. I did not find it anything that required a waterproof jacket during my visit. The upper Yosemite fall trail is a little longer with more elevation again. Personally, I thought the view from the lower falls trail was magnificent. I skipped the upper falls trail. Once you leave the parking area for the lodge, you will continue around and the loop. Look back to the left for more great viewing of Bridalveil Falls as you drive. There are areas to park on the side of the road for photos. You will come to the junction where you can turn back to the left to return to 41 and exit the south park exit. As an alternative, you can continue straight to utilize 120 or 140. The second day I went via 140. It is probably slightly longer, but the drive is a little easier with less twists and turns.
I am by no stretch of the imagination a Yosemite National Park expert. However, I wanted to convey as much simplified information as possible. When deciding how much time to spend in the park, make a list of what you hope to see prior to arrival. If you only have one day, it is still worthwhile to make a visit. You would have to spent your time on the main sights and short hikes. For these purposes, the lower Yosemite falls hike should definitely be considered. For me personally, two days in the park allowed me to see what I wanted. It afforded me time to hike lower Yosemite falls and Mirror Lake while stopping many times along the drive for photos and exploring. I think in an ideal world three days would be just right to add in another hike perhaps the Mist Trail or Glacier Point. Take into account time moving throughout the park and actually gaining entry particularly dependent upon the time of year. My first day in the park was a Thursday, and I got delayed exiting the park making the loop back around to 41 due to construction. On the second day, the line for park entry was much longer. I spent time sitting on 41 outside the South entrance waiting in the line. Delays always happen, so don’t be overzealous in your planning!